Showing posts with label Diane's Craft Space. Show all posts

Saturday, March 12, 2022

Step It Up Saturday

 Welcome back to my page and to another edition of Step It Up Saturday. It seems that I like to wake up REALLY early on these days, 3:12 am this time. I'm definitely squeezing in a nap at some point before work this afternoon. 

On Sunday, I posted a simple Beginner card using the Bokeh Technique. It's pretty much stamp, ink, paper, with a couple of tools. I also created a Tuesday Night Live video where I recreated the card to show how simple it really is make. This was my first Live, so if you watch it, please be kind. It's not all that bad but you can tell I'm new at it. I already learned that I put my phone on the stand in wrong. See the video here on my Facebook group, Diane's Craft Space. Here's my Beginner card:

Supplies used:

 I did a Simple Casual card next for the Krafty Chicks Challenge this week. It's pretty much the same card but I changed the colours and added a couple of focal elements.

Supplies used:

On Friday, I created an Casual card following the Freshly Made Sketches challenge.


To amp it up a tad, I added DSP and some gold heat embossing. I also fussy cut the sentiment.

Supplies used:

So for my last card, I went all Avid and kicked it up one more notch by adding more stamped die cuts and changed the layout a bit. I think I'm going to add some Black Matte Dots.

Supplies used:

I hope you liked this week's Step It Up Saturday cards. They were really fun to make and came together quickly. Let's see them side by side:


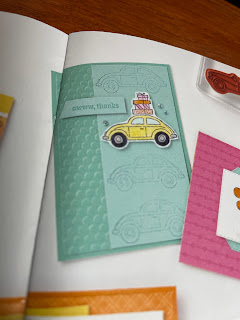
And I also decorated the inside and envelope as I usually do.

Have your self a very merry Saturday! Make some time this weekend to get your craft on. I'm off to make some more much needed coffee, and wish me luck for that nap.

Saturday, January 29, 2022

Step It Up Saturday

 Well it’s Saturday! For most people that means sleeping in, but oh no, not me. It’s right before the crack of dawn (4:30am) and as I roll over in bed, a thought comes in my head about this post. Now my brain is like a dog with a bone: it won’t let it go until I see it through.

Earlier this week, I posted a simple Beginner card that I cased from the SAB (Sale-A-Bration) brochure on my Facebook group, Diane’s Craft Space.


It came together quickly and used minimal products: stamp, ink, paper, scissors (to fussy cut the ladybug instead of the added cost of the punch) and adhesive. Beginners don’t have much of a card making stash but as shown here, they can still make a pretty awesome card. 

Once I finished this card, I thought, this can easily be stepped up for a Casual card maker.


On this card, instead of stamping my background, I added DSP (Designer Series Paper). I also added a matte for the sentiment, black dots and a small bow to the lady bug. These additions are quite inexpensive to purchase once you already own stamp, ink, paper, basic tools and adhesive.

Now comes the stepped up version for the Avid crafter. They have been card making for some time, they already own the basics and can now add the big guns to their collection of craft supplies.


Here we introduce the Stampin’ Cut & Emboss machine, a die and an embossing folder as well as the coordinating Ladybug Builder punch. Now I’m not saying a Beginner can’t use or afford the big guns. They can. If they have the budget and some tutelage, it can easily be done. It’s just most Beginners need to pace themselves into the art of card making supplies and knowledge. It’s also good for an Avid or Casual stamper to go back to basics sometimes. Sometimes less is more and more doesn’t mean better.

Here are my cards side by side to compare “skill” levels.


Supplies used Beginner:

Add on supplies for Casual stamper:
Add on for the Avid crafter:
I hope you enjoyed seeing my stepped up versions of a very simple card. Here is the inspiration from the SAB brochure:

Have yourself a very merry Saturday! Make some time this weekend to get your craft on. I’m off for coffee number two and fingers crossed: a nap this afternoon.

Friday, January 28, 2022

Freshly Made Sketches #520

 Welcome back, I’m so glad you stopped in. I have a simple card to share with you today.

I played along with the layout from Freshly Made Sketches #520. As soon as I saw it, I thought of the big half rainbow die from the Brilliant Rainbow dies.

I apologize for featuring the Rainbow Of Happiness Bundle again but I can't get enough of it. And you have to agree with the big half rainbow is perfect for this sketch. I went with a more pastel tone than the vibrant colours of a usual rainbow. Originally I was going to use the Sunshine & Rainbows DSP from the SAB (Sale-A-Bration) brochure but every paper I picked would be too wide and cover too much of the rainbow. I thought of white ribbon next and was happy that I can see through enough to still see the rainbow.

Supplies Used:


I kept the inside of the card as simple as possible with a simple strip of card stock and a star. For the envelope, I used one of the card stock panels that has the rainbow die cut out as a stencil and a sponge dauber to add the colours and stuck another star.


Well that's all for today! Here's hoping you can squeeze in some crafty time this weekend.


Friday, January 21, 2022

Freshly Made Sketches #519

 Coming at you today with another card inspiration. I'm trying to spend more time creating and blogging with less time on Netflix and Prime TV. This week is working out but I'm feeling a bit overwhelmed since most of my projects are last minute. Hopefully on my days off next week, I can get a few cards/blog posts ahead and not feel so rushed. Enough whining! Let's get to the card!

A great way to get creative is to play along with challenges. I have bookmarked a few that I think are my types of challenges. I like sketches, colour palettes, and themes. For this card, I played with the Freshly Made Sketches Challenge #519.

It's Clean And Simple (CAS) in design and it all came together quite quickly once I decided on the stamp set.

Supplies I used:

I finished off the inside with the left over bits from the rainbow die cuts and used a Bermuda Bay Stampin' Write marker for the smallest arch. The strip of Melon Mambo anchors my rainbow. For the envelope I stamped the rainbow using Stampin' Write markers as my ink. Once my Sunshine & Rainbows DSP comes in on Monday, I think I will add some to the flap. I think it looks naked now without something on it. 

The Sunshine & Rainbows DSP (158126) I received for FREE when my order was more than $60 during the Sale-A-Bration promotion. Want some Stampin' Up! exclusive product for FREE too?? You will not see these products carry over once February 28, 2022 rolls around. And all the FREE products in the brochure are while supplies last, so they might not even make it to February 28. See the brochure here: https://issuu.com/stampinup/docs/sab22_en_ca?fr=sN2M0OTQ1MTA2ODU. Then go shopping to qualify to get FREE products.

Hope you have time to get creative today. Have an amazing day!


Monday, September 6, 2021

Fall Forever Fern Card Challenge

I recently decided that there wasn't enough on my plate and took on the role of hosting a Project Challenge in one of my Facebook groups: All Canadian Stamperz - Buy, Sell, Inspire and Share. Honestly though, all that it requires me to do is find a graphic, add text, create an album, make a card, post to album, and comment on other entries. September is when we start seeing signs of FALL, hence why I chose that theme. I also extended the challenge onto my own Facebook Group called: Diane's Craft Space.

 Where do you get your inspirations from?? Sometimes I use a sketch or a colour combo, sometimes it's a picture or a scene, and sometimes it's a box of Kleenex. Yup!

 
While brushing my teeth one morning, I look around and my eyes catch the box of Kleenex. Now it's been sitting there for a couple of weeks, I grab a tissue everyday, I sit on the toilet more than once a day (keeping it real) and it's never once drawn me to really take a look at it. Instantly, I think I can make a card, Forever Fern stamp set, fall colours, I'm doing it! Grabbed my phone and took a pic. Run downstairs to my craft space.

I couldn't find a light enough striped DSP (Designer Series Paper) but I did find some already textured looking ones in my retired stash. But there was still some brightness to it and I wanted to fade it out more. As I've played with mixed media before, the gesso look is what I was going for and the Stampin' Up! version is White Craft ink and a sponge. Then I used my heat gun to dry it but it was still taking a while and decided to leave it overnight, I had to go to work soon anyway.

Next was to pick my colour palette. I'm picturing a maple leaf in my mind, so decide on Cherry Cobbler, Cajun Craze, Pumpkin Pie, Crushed Curry, and Old Olive. Not sure if you've ever tried the Baby Wipe Technique but it's a simple way of getting a variegated palette. Simply squirt a few drops of each colour on the wipe, pounce your stamp onto palette moving it a little up, down, left and right. Not drastically moving it as you don't want to muddy the colours on your stamp but be sure it's all covered and a bit blended. Last step is to stamp it onto card stock.

I just repeated the process a few times on both DSP layers until I was happy with the look. Mounted it onto Cherry Cobbler and Pumpkin Pie card stock and that layer onto a Thick Basic White base. I stamped the sentiment directly onto the DSP. I goofed on the Pumpkin Pie card so I needed to mount a label to hide my little mishap. Simply white embossed the sentiment on the label, popped it up on dimensionals and you'd never know there was a boo-boo under there.

Supplies I used:

  • Forever Fern stamp set: 152559
  • VersaMark ink pad: 102283
  • Cherry Cobbler ink pad: 147083
  • Pumpkin Pie ink pad: 147086
  • Cherry Cobbler ink refill: 119788
  • Cajun Craze ink refill: 119790
  • Pumpkin Pie ink refill: 105229
  • Crushed Curry ink refill: 131158
  • Old Olive ink refill: 100531
  • White Craft ink refill: 101780
  • Thick Basic White card stock: 159229
  • Cherry Cobbler card stoc119685k: 
  • Pumpkin Pie card stock: 105117
  • Fine Art Floral DSP: retired
  • Heat Tool: 129053
  • White Embossing powder: 155554
  • Sponge: retired, you can use sponge dauber (133773) but it might take longer
  • Tasteful labels Dies: 152886
  • Stampin' Dimensionals: 104430

As you all know, no card is complete without a simply decorated inside and envelope. I wasn't able to finish off this last part at the same time as the card so I put my "stamp pad" into a Ziploc bag with another clean wet baby wipe (to help keep it moist). And it was still usable after a 7 hour work shift. The colours had drifted closer together but hadn't muddied yet. I left it overnight just to see what it would look like, it didn't muddy but the colour was wider spread, thicker bands of colour and not the look I was going for but still moist enough to keep using if I wanted to.

And so that was fun! I hope you try the technique. You could also find many videos on YouTube that can teach the Baby Wipe Technique if I didn't explain it clearly. Also if you would like to join the September Fall Challenge in Diane's Craft Space, add your project to the Album.

Can't wait to see the amazing creations come pouring in!