Monday, September 6, 2021

Fall Forever Fern Card Challenge

I recently decided that there wasn't enough on my plate and took on the role of hosting a Project Challenge in one of my Facebook groups: All Canadian Stamperz - Buy, Sell, Inspire and Share. Honestly though, all that it requires me to do is find a graphic, add text, create an album, make a card, post to album, and comment on other entries. September is when we start seeing signs of FALL, hence why I chose that theme. I also extended the challenge onto my own Facebook Group called: Diane's Craft Space.

 Where do you get your inspirations from?? Sometimes I use a sketch or a colour combo, sometimes it's a picture or a scene, and sometimes it's a box of Kleenex. Yup!

 
While brushing my teeth one morning, I look around and my eyes catch the box of Kleenex. Now it's been sitting there for a couple of weeks, I grab a tissue everyday, I sit on the toilet more than once a day (keeping it real) and it's never once drawn me to really take a look at it. Instantly, I think I can make a card, Forever Fern stamp set, fall colours, I'm doing it! Grabbed my phone and took a pic. Run downstairs to my craft space.

I couldn't find a light enough striped DSP (Designer Series Paper) but I did find some already textured looking ones in my retired stash. But there was still some brightness to it and I wanted to fade it out more. As I've played with mixed media before, the gesso look is what I was going for and the Stampin' Up! version is White Craft ink and a sponge. Then I used my heat gun to dry it but it was still taking a while and decided to leave it overnight, I had to go to work soon anyway.

Next was to pick my colour palette. I'm picturing a maple leaf in my mind, so decide on Cherry Cobbler, Cajun Craze, Pumpkin Pie, Crushed Curry, and Old Olive. Not sure if you've ever tried the Baby Wipe Technique but it's a simple way of getting a variegated palette. Simply squirt a few drops of each colour on the wipe, pounce your stamp onto palette moving it a little up, down, left and right. Not drastically moving it as you don't want to muddy the colours on your stamp but be sure it's all covered and a bit blended. Last step is to stamp it onto card stock.

I just repeated the process a few times on both DSP layers until I was happy with the look. Mounted it onto Cherry Cobbler and Pumpkin Pie card stock and that layer onto a Thick Basic White base. I stamped the sentiment directly onto the DSP. I goofed on the Pumpkin Pie card so I needed to mount a label to hide my little mishap. Simply white embossed the sentiment on the label, popped it up on dimensionals and you'd never know there was a boo-boo under there.

Supplies I used:

  • Forever Fern stamp set: 152559
  • VersaMark ink pad: 102283
  • Cherry Cobbler ink pad: 147083
  • Pumpkin Pie ink pad: 147086
  • Cherry Cobbler ink refill: 119788
  • Cajun Craze ink refill: 119790
  • Pumpkin Pie ink refill: 105229
  • Crushed Curry ink refill: 131158
  • Old Olive ink refill: 100531
  • White Craft ink refill: 101780
  • Thick Basic White card stock: 159229
  • Cherry Cobbler card stoc119685k: 
  • Pumpkin Pie card stock: 105117
  • Fine Art Floral DSP: retired
  • Heat Tool: 129053
  • White Embossing powder: 155554
  • Sponge: retired, you can use sponge dauber (133773) but it might take longer
  • Tasteful labels Dies: 152886
  • Stampin' Dimensionals: 104430

As you all know, no card is complete without a simply decorated inside and envelope. I wasn't able to finish off this last part at the same time as the card so I put my "stamp pad" into a Ziploc bag with another clean wet baby wipe (to help keep it moist). And it was still usable after a 7 hour work shift. The colours had drifted closer together but hadn't muddied yet. I left it overnight just to see what it would look like, it didn't muddy but the colour was wider spread, thicker bands of colour and not the look I was going for but still moist enough to keep using if I wanted to.

And so that was fun! I hope you try the technique. You could also find many videos on YouTube that can teach the Baby Wipe Technique if I didn't explain it clearly. Also if you would like to join the September Fall Challenge in Diane's Craft Space, add your project to the Album.

Can't wait to see the amazing creations come pouring in!


Sunday, September 5, 2021

Paper Pumpkin August 2021: HOPE BOX

 This is the first time in the history of me buying Paper Pumpkin that I have actually finished a card kit, made alternates and used up almost all of the elements. That is besides the Treat Packaging for Halloween and Valentines. Maybe I shouldn't admit that to you, being a Demonstrator and all but I like to keep it real and be honest. Want to know another truth?? I have a stock pile of past Paper Pumpkin waiting for my attention, possibly 1.5 - 2 years worth. No joke!

 A little background on the August kit:

  • it was created by the cofounder of Stampin' Up!, Shelli to remind us of why life is so precious
  • the Hope Box was designed to be a keepsake box- keep mementos of cherished memories, reminders of what is yet to come, treats, and trinkets that represent what hope means to you
  • you could keep it for yourself or gift it to someone who could use some uplifting
     
    I decorated mine as per instructions in the kit. I'm loving that they are now in colour  instead of boring old grayscale. Makes it that much easier to assemble the kit; it even tells you where to attach the glue dots and dimensionals.

    I'll show you the cards as they were designed for the kit first. Look familiar?? I posted these for the Krafty Chicks Challenge on Thursday, September 2nd. You can scroll down to find it or click here, so much easier.


    They are wonderful as they were designed but I wanted to try alternatives. FYI: instructions also give you three added alternatives. And you can also find more inspiration on Pinterest by following Paper Pumpkin. So here is my first batch of alternatives:


    By just changing some of the elements around, fraying the ribbon, and adding some Basic Black card stock with white embossing powder, I was able to get something similar yet different and just as pretty. Oh and I remembered to use the sequins this time!
    For the last batch of alternatives, I did get inspiration for one card from Emily, EMK Creations on Facebook, where she used the stencil as a mask. YES!


    I'm very pleased by the way they turned out. So please that I will be offering a class for the Alternatives using the Refill Kit. Sadly, since the ribbon isn't included in the refill kit, I will have to substitute it with card stock for banners and twine.
    • Anyone who purchased a full kit through me will get the class for free and must bring and use their own kit for In-Person class. I will provide the extra materials.
    • For all others, cost is $20 for In-Person class. You get the refill kit and all added material. Be aware, there is NO stamp set and NO ink spot in the refill kit. You will be using mine.
    • Crafty Inkettes United Card Club members: Cost $18, refills can be added in your monthly order, just pay the difference.
    • Virtual option will available if needed. Cost would be $20 plus added shipping rate to you. You get the refill kit and all added material. Be aware, there is NO stamp set and NO ink spot in the refill kit. You can substitute with any suitable stamp sets you already own. I cannot stamp images or sentiments as per SU! rules.
    • Email me at: su.ink.outside.the.box@gmail.com and let me know if you want more than one kit (add $15 for each additional kit, plus shipping if required).
    • Deadline to order is Tuesday, September 14 by 9pm.
    • Class will be hosted in my home on Monday, September 27th from 11:45-2:45pm.
    • Limited space available for In-Person Class and while stock last from Stampin' Up! store.
    I can't wait to craft with you soon!

Thursday, September 2, 2021

Krafty Chicks Challenge #575: Stamp Act

 Happy Krafty Chicks Thursday to you!

Welcome September! It's back to school for many Alberta students and the end of summer vacation. I have the honour of driving my grandsons on their first back today, a tradition we started with Kenley. He is entering Grade 2 this year. Man, he is growing up too fast. My little Atticus is starting Kindergarten and we hope he's as excited as he was in preschool last year.

Onto my card for this week's Krafty Chicks Challenge : Stamp Act. As long as something is stamped, be it an image or a sentiment, it qualifies for the Stamp Act challenge.

This card is from the August 2021 Paper Pumpkin kit called Hope Box. This kit creates 9 cards, three times three designs and decorates the keepsake box. Scroll further down to see the others. I absolutely loved this kit and couldn't stop playing. I've even created 3 more alternative cards but I'll save those for another post this weekend.

Here is the second card:


"Paper Pumpkin by Stampin' Up! is a crafting subscription kit that delivers creativity to your door every month. Each box includes everything you need to make a stunning project. You'll be surprised with projects like cards, gift packaging, home decor and more for just $30 a month (shipping included).

Talk about happy mail!" Quoted right from the Paper Pumpkin page. Now the third card:


 Paper Pumpkin (PP) kits are fabulous for all stampers from beginner, to casual, to avid ones. I often refer my new to stamping customers to start with PP. It's a great way to build up a stash of crafting products monthly and not break the bank. All PP kits come with a unique stamp set with an ink spot (that won't repeat a colour in a 12 month period), and all the supplies needed to create the project within. Your first subscription kit even comes with a block, so you can get started right away.

You are too late to order this kit but you can get the Hope Box Paper Pumpkin Refill (159345) if you are a PP Subscriber or message me and I can get it for you. Be aware though that a Refill kit does NOT have the stamp set or the ink spot, just the materials to create.

Need more inspiration for the Stamp Act challenge, hop on over to the Krafty Chicks Challenge Blog to get the details. And upload your project so that we can see what's happening in your craft space.

Here's a direct link to our wonderful Design Team's personal blogs:

Leanne's Blog

Melanie's Blog

Lori's Blog

Bonnie (Guest Designer) 


Thursday, August 26, 2021

Krafty Chicks Challenge #574: All Occasions

Happy Krafty Chicks Thursday to you!

Welcome to another great challenge week from the Krafty Chicks Challenge Blog. All Occasions is the theme, so pretty much anything goes. Here's my card:


I created this card from a challenge issued by a Demonstrator support group on Facebook. It's a Case The Catty (catalogue) challenge and they gave us the sketch.

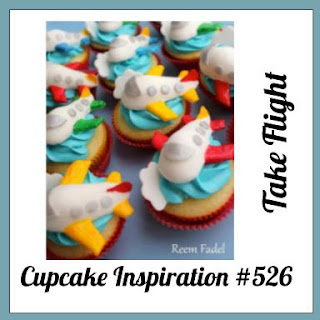
I will also be entering my card in Cupcake Inspirations' challenge #526. The theme is Take Flight. My first thought was a hot air balloon and I have a retired stamp set perfect for this challenge but I went with the dragonflies again. It was almost butterflies though.

I can't believe that it's the first time I use that stamp set. It's fine time I showed it some love. I used gold embossing powder on vellum for the sentiment, and absolutely LOVE the look.

Supplies I used:

  • Happiest of Birthdays stamp set: 152539.
  • VersaMark ink pad: 102283
  • Thick Basic White card stock: 159229
  • Blackberry Bliss card stock: 133675
  • Dandy Garden Designer Series Paper: retired
  • Vellum card stock: 101856
  • Heat tool: 129053
  • Gold embossing powder: 155555
  • Dragonflies punch: 154240
  • Multipurpose liquid glue: 110755
  • Stampin' Dimensionals: 104430

Since I like to keep the inside of the card and the envelope simple, I just added a strip of Blackberry Bliss with a couple of dragonflies and a bit of DSP onto the envelope flap. Maybe you hadn't noticed yet but all those dragonflies are not stamped images, they are all punched from DSP which made for a quick and easy card and matching envelope.

Now head on over to the Krafty Chicks Challenge Blog for more details about the challenge and for more inspiration for All Occasions week from the Design Team. There's even a place to upload your project at the end. I hope you play along with us and show us what's happening in your craft space.

Here's a direct link to our wonderful Design Team's personal blogs:

Leanne's Blog

Melanie's Blog

Lori's Blog

Lisa J's (Guest Designer) 


Thursday, August 19, 2021

Krafty Chicks Challenge #573 - CAS

 Happy Krafty Chicks Thursday to you!

Are you ready for this week's challenge? I'm the hostess and we are looking for CAS, as in Clean And Simple. Here's my card:

This card came about after an admin from a Facebook group reminded us of the SUMMER theme challenge. The funny part is: I am the one hosting this challenge. And I totally forgot about it. There was only one other entry at the time, so hopefully we get a little more interest. It will start off slow, I can understand that, being new and all, and it is August where many are on summer vacation and don't do much crafting. Say what?? Yeah, shocking! But I'm guilty of that too.

I also went looking for another challenge to play along with. Starting with a sketch from CAS Colours & Sketches #432. When I saw Jeanne's creation, I saw the Dragonfly Garden stamp set instantly and was sold! Sadly, I'm too late to enter this challenge but I had fun all the same.

 I have dear friend that's on the Design Team for the colour combo I chose. You know her as Krafty Chick Leanne. I promised (most likely in my head) to play along with the Cupcakes Inspirations challenges since I discovered it but you know me and my procrastination ways. Anywoo! I'm now in! I've submitted my entry and everything. I do love this colour combo!

I ordered the Soft Pastels a few weeks ago and thought this is the card to have a crack at using them. They are so easy to play with. Must remember to blow the dust before blending or you will colour outside the lines like a kid in kindergarten. Lol!

Supplies I used:

  • Dragonfly Garden stamp set: 154411
  • Memento ink pad: 132708
  • VersaMark ink pad: 102283
  • White Embossing Powder: 155554
  • Soft Pastels Assortment: 154585
  • Soft Suede Stampin' Blends Combo: 154906
  • Thick Basic White card stock: 159229
  • Real Red card stock: 102482
  • Dragonflies punch: 154240
  • Heat Tool: 129053
  • Water Painters: 151298
  • Stampin' Dimensionals: 104430

 I like to keep the inside of the card and the envelope just as CAS leaving room for a message (in the card) and the address (on the envelope). To stay on theme, I added a strip of Real Red and of course the dragonflies.

Want some more inspiration?? Go check out the Krafty Chicks Challenge Blog to see what the Design Team have created. Hope you play along and upload your project so that we can see what's happening in your craft space.

Here's a direct link to our wonderful Design Team's personal blogs:

Leanne's Blog

Melanie's Blog

Lori's Blog

Lisa (Guest Designer) 


Thursday, August 12, 2021

Krafty Chicks Challenge #572: Christmas Week

Yeah, it's Thursday! Time for another great challenge from the Krafty Chicks Challenge Blog. Let's put the spotlight on Christmas this week!

I recently received my pre-order from the new Mini July-December 2021 catalogue and just had to use the Merriest Moments Bundle. It comes with a stamp set, coordinating dies and a Hybrid Embossing folder. I was so excited to play around. You won't "get" it until you buy yours!

Supplies I used:

  • Merriest Moments stamp set: 156353
  • Merriest Frames Hybrid Embossing Folder 156385
  • Stampin' Cut & Emboss Machine: 149653
  • Mossy Meadow ink pad: 147111
  • Merry Merlot ink pad: 147112
  • Crushed Curry ink pad: 147087
  • Thick Basic White card stock:159229
  • Mossy Meadow card stock: 133676
  • Gold Foil Sheets: 132622
  • Gold Wink of Stella: retired
  • Stampin' Dimensionals: 104430

When I started putting my layers together, I didn't mind the simplicity of just embossing the panel and popping the sentiment. It was pretty on it's own, and if I was in a hurry, I could have left it just like that. But we all know, I love layers. So I kept going. Added some poinsettias and holly leaves but it still needed something: dazzle. In came the glitter splatters to finish it off.


I like to keep the inside of the card and the envelope just as CAS. This time a simple strip of green and gold on the bottom topped with holly leaves and berries for the inside of the card. And for the envelope, stamped the poinsettia in the corner and randomly all over the flap. Added some holly leaves to fill in the gaps and it's done.

Head on over to the Krafty Chicks Challenge Blog for more details about the challenge and for more inspiration for Christmas week from the Design Team. There's even a place to upload your project at the end. I hope you play along with us and show us what's happening in your craft space.

Here's a direct link to our wonderful Design Team's personal blogs:

Leanne's Blog

Nance's Blog

Lori's Blog

Lisa (Guest Designer) 


Thursday, August 5, 2021

Krafty Chicks Challenge #571: Stamp Act

 Happy Krafty Chicks Thursday to you!

Welcome August and more summer weather. We had another hot and humid few days in Alberta, making it very difficult to work in front of two pizza ovens but gorgeous enough to play in the garden, that's thriving with veggies. I had my grandson here for the week and we had an amazing time, just no crafty and blog time, so this post was late.

Onto my card for this week's Krafty Chicks Challenge : Stamp Act. As long as something is stamped, be it an image or a sentiment, it qualifies for the Stamp Act challenge.

This card was so fun to create. I received a card from a Secret Sister using this "buckle" fold and I just had to try it out. Isn't the sheep adorable?? As soon as I saw in the Sale-A-Bration (called SAB) brochure, I just had to have it and the matching dies of course. They are both Level One FREE products, which means: for every $60 spent, I received one item. It's also the launch of the new July-December Mini Catalogue (called JD2021 in the future), so spending that amount was easy.

Supplies I used:

  • Counting Sheep stamp set:156591 (SAB, limited time, FREE wit h$60 purchase)
  • Sheep Dies: 156600 (SAB, limited time, FREE with $60 purchase)
  • Coastal Cabana ink pad: 147097
  • Granny Apple Green ink pad: 147095
  • Memento ink pad: 132708
  • Petal Pink Stampin' Blends Combo: 154893
  • Smoky Slate Stampin' Blends Combo: 154904
  • Basic Black Stampin' Blends Combo: 154843
  • Color Lifter Stampin' Blend: 144608
  • Basic White Thick card stock159229
  • Bumble Bee card stock: 153077
  • In Color 2020-2022 DSP: retired 
  • Blending Brushes: 153611
  • Stampin' Dimensionals: 104430
  • Multipurpose Liquid Glue: 110755

I like to keep the inside of the card and the envelope CAS (Clean And Simple). This time I went with adding some DSP to the flap since it's retired now and my stash keeps getting bigger, I might as well use it up. And of course another sheep on the front. Did you notice it was mirror image?? You can easily do this by stamping on your silicone craft mat (127853) and quickly flipping it where you want it stamped. It is a lighter imprint, not as solid but I used the Basic Black Stampin' Write Marker (100082) to trace it after I coloured it. Same goes for the image on the inside of the card.

Need more inspiration for the Stamp Act challenge, hop on over to the Krafty Chicks Challenge Blog to get the details. And upload your project so that we can see what's happening in your craft space.

Here's a direct link to our wonderful Design Team's personal blogs:

Leanne's Blog

Nance's Blog

Lori's Blog

Lisa J's Blog (Guest Designer)